Player storyboard에서 PlayerView를 만들것이다.
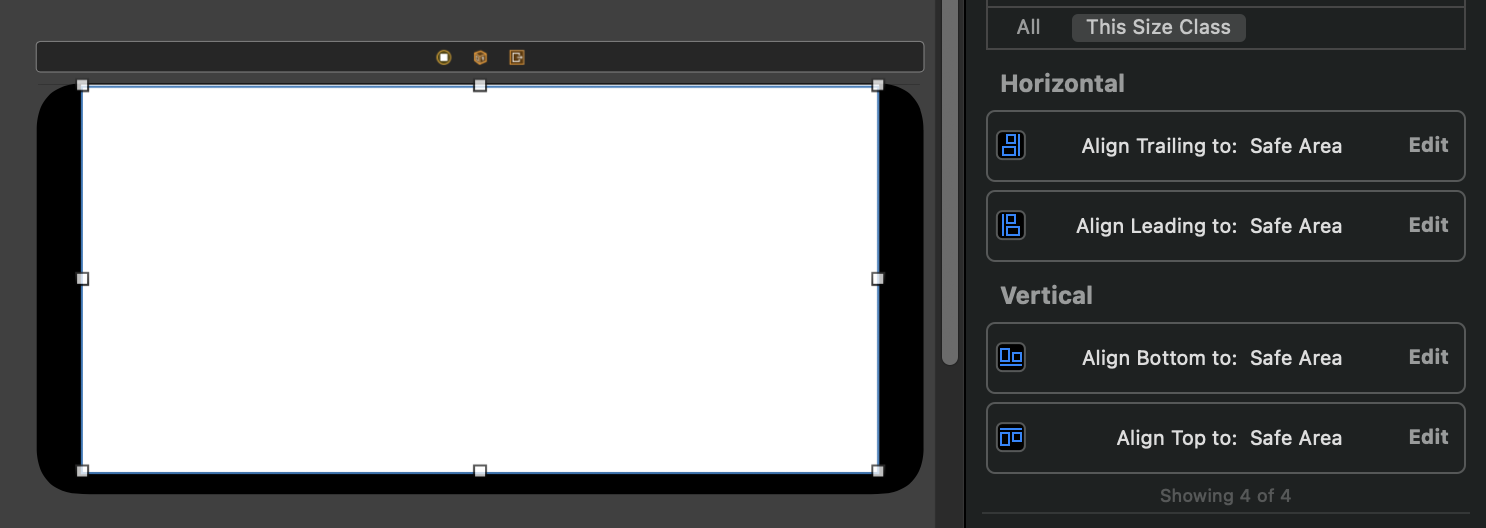
View를 넣고 superView과 top, bottom, leading, trailing을 모두 0으로 맞춘다.

여기서 top, bottom의 경우는 safeArea가 아닌 superView에 맞춘다.


이제 이 흰색화면에서 영상이 재생되는 것이다.
AVPlayer
이를 구현하기 위해서는 AppleMusic Application에서 사용한 것과 같이 AVPlayer를 사용한다.
음악, 동영상을 재생할 때 사용하는 API이다.
AVPlayerView
https://developer.apple.com/documentation/avkit/avplayerview
AVPlayerLayer
https://developer.apple.com/documentation/avfoundation/avplayerlayer
AVPlayerView 와 AVPlayerLayer
—> 차이점은 AVPlayerLayer를 사용하면 Custom player를 생성할 수 있다.
https://hsue66.github.io/2017/11/08/AVPlayerViewController-vs.-AVPlayerLayer/

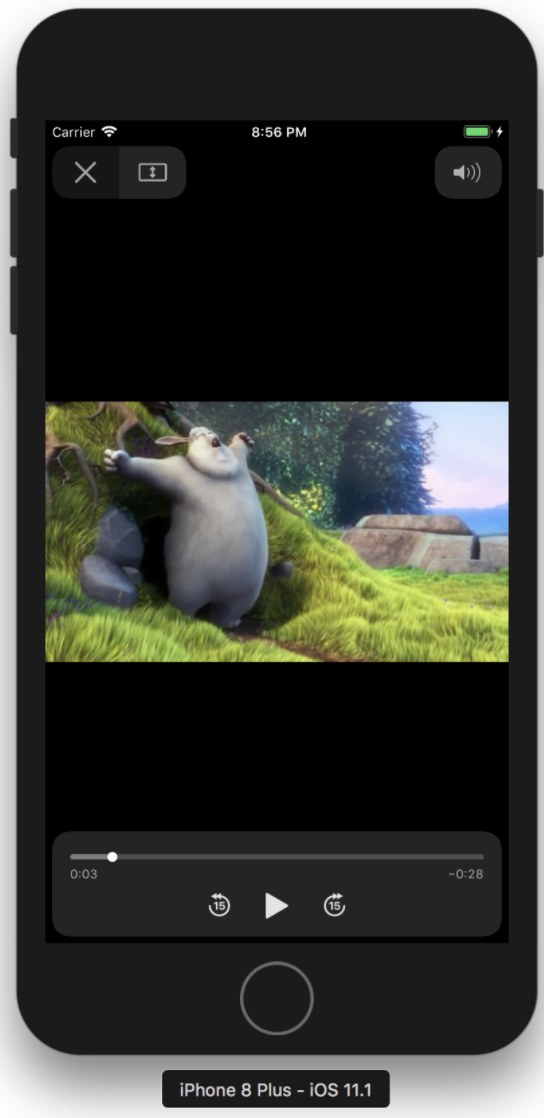
PlayerViewController의 경우에는 위와 같이 재생, 진행바, 음량버튼 등이 구현되어있는 화면으로 실행된다.

AVPlayerViewController와 다르게 직접 추가한 View외에는 아무것도 표시되지 않는다.
→ AVPlayerLayer를 사용하면 Custom player를 생성할 수 있다.

AVPlayerLayer를 사용하려면 위와같이 Custom Class를 만들어 줘야한다.
PlayerView를 만들고 Custom Class를 똑같이 만들어 사용한다.

이 클래스를 Storyboard에서 View의 custom class로 지정하면 된다.

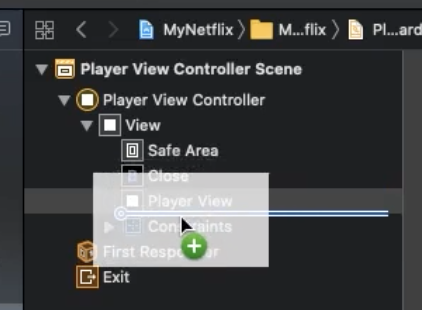
이 PlayerView가 PlayerViewController에서 컨트롤 되도록 연결을 해주자.


Control View

우선 PlayerViewController을 영상의 제어가 기본적으로 가능한 View들이 존재한다.
그러나 AVPlayerLayer를 이용하게 되면 내가 지정한 것만 보여지게된다. Custom
그렇다면 위의 화면에서 보이는 재생과 멈춤, 닫기는 직접 만들어야 한다.
Control View로 만들어 보자.
View를 끄집어와서 넣고 PlayerView와 같은 사이즈로 맞추자
잘못 넣으면 ControlView가 Playerview 아래로 가는 경우가 존재하기에 주의하자!!
10. UIComponents 누가 위에 있나?
굉장히 간단한 문제지만 이제 알게 되었구만 PlayerView background color은 pink이고, ControlView background color은 teal이다. 지금은 ControlView가 위에있다. 왜? 순서대로 쌓이기 때문이다!!! View -> Safe..
yeongwoo-cho.tistory.com


Play button and control button을 controlView에 넣는다. --> 기존의 close button은 지우면 된다.
그 후 PlayerView와 ControlView모두 clear color로 투명하게 만들고 두 버튼은 white로 가자.
물론 Select 상태까지 만든다.


그리고 기존에 만들어 두었던 close를 ControlView안의 Close Button과 연결시킨다.
Play Button의 상태를 나타내는 outlet과 눌렀을때 반응으로 Action의 기능을 담을 togglePlayButton을 연결한다.

'Toy Project > Netflix Style Application(iOS)' 카테고리의 다른 글
| 11. 오늘의 영화 구현 (0) | 2021.05.02 |
|---|---|
| 10. PlayerView (0) | 2021.05.02 |
| 8. Player View 가로모드 구현 (0) | 2021.05.01 |
| 7. Search 결과 구현 3 - OpenSource Kingfisher (0) | 2021.04.28 |
| 6. Search 결과 구현 2 - UI Update through MainQueue (0) | 2021.04.28 |